在老旧GPU上安装pytorch的方法
2021-03-26
20210526更新
从结果来看,本文的方法依然不能投太多的懒,所以后来笔者就亲自编译了torch 1.9和torchvision 0.9的whl安装文件。 这里详细的编译过程就不赘述,直接列出安装文件,需要的读者可以直接下载安装使用。 注意的是在执行pip操作之前需要安装最新的cuda和cudnn以及最新的驱动,参考博文Ubuntu16.04下如何安装显卡驱动、cuda、cudnn。 以笔者的为例:
- 系统版本是ubuntu 16.04 LTS
- 显卡有2块:1块1660TI,1块M40 24G
- 驱动465,cuda版本11.3,cudnn 8.2
```
Wed May 26 17:04:49 2021
+—————————————————————————–+ | NVIDIA-SMI 465.19.01 Driver Version: 465.19.01 CUDA Version: 11.3 | |——————————-+———————-+———————-+ | GPU Name Persistence-M| Bus-Id Disp.A | Volatile Uncorr. ECC | | Fan Temp Perf Pwr:Usage/Cap| Memory-Usage | GPU-Util Compute M. | | | | MIG M. | |===============================+======================+======================| | 0 NVIDIA GeForce … Off | 00000000:01:00.0 Off | N/A | | 0% 38C P8 9W / 140W | 198MiB / 5942MiB | 0% Default | | | | N/A | +——————————-+———————-+———————-+ | 1 NVIDIA Tesla M4… Off | 00000000:05:00.0 Off | 0 | | N/A 29C P8 19W / 250W | 1MiB / 22945MiB | 0% Default | | | | N/A | +——————————-+———————-+———————-+
+—————————————————————————–+ | Processes: | | GPU GI CI PID Type Process name GPU Memory | | ID ID Usage | |=============================================================================| | 0 N/A N/A 1217 G /usr/lib/xorg/Xorg 146MiB | | 0 N/A N/A 1908 G compiz 49MiB | +—————————————————————————–+
pytorch 1.9和torchvision 0.9的安装包链接如下:
链接:https://pan.baidu.com/s/19gDdmkTeL9ThnQ5s2rHcig 提取码:b7me 复制这段内容后打开百度网盘手机App,操作更方便哦
## 以下是原文
本着节约的原则花1000块买了一块k40c的显卡,但是在运行pytorch直接就出现了这个问题:
RuntimeError: CUDA error: no kernel image is available for execution on the device Turns out that PyTorch v1.6.0 dropped support for GPUs with NVIDIA compute capability 3.5 in their prebuilt binaries that you’d get from pip or conda —the stated reason was that supporting these older GPUs would have pushed binary sizes past acceptable limits for distribution.
看来只能试着源码安装。无奈源码安装也遇到了各种问题。于是谷歌一番找到了适合老旧GPU的pytorch安装包。

由于使用pip安装比较简单,这里就直接列出来:

- 仓库地址:https://github.com/nelson-liu/pytorch-manylinux-binaries/releases

- 安装示例:
    ```
    pip install torch==1.8.0+cu111 -f https://nelsonliu.me/files/pytorch/whl/torch_stable.html
    ```
打开链接'''https://cs.stanford.edu/~nfliu/files/pytorch/whl/torch_stable.html'''可以看到各种版本pytorch+cuda的安装包(比如1.8.0):
torch-1.8.0+cu101-cp36-cp36m-linux_x86_64.whl torch-1.8.0+cu101-cp37-cp37m-linux_x86_64.whl torch-1.8.0+cu101-cp38-cp38-linux_x86_64.whl torch-1.8.0+cu101-cp39-cp39-linux_x86_64.whl torch-1.8.0+cu102-cp36-cp36m-linux_x86_64.whl torch-1.8.0+cu102-cp37-cp37m-linux_x86_64.whl torch-1.8.0+cu102-cp38-cp38-linux_x86_64.whl torch-1.8.0+cu102-cp39-cp39-linux_x86_64.whl torch-1.8.0+cu111-cp36-cp36m-linux_x86_64.whl torch-1.8.0+cu111-cp37-cp37m-linux_x86_64.whl torch-1.8.0+cu111-cp38-cp38-linux_x86_64.whl torch-1.8.0+cu111-cp39-cp39-linux_x86_64.whl ```
阅读全文 »
python中os包和sys包的常用命令
2021-02-27
本文列举了一些常用的os包和sys包的操作。笔者认为记住一些自带系统包的操作在实际的开发过程中能节省时间。
os和sys的官方解释
- os os: 这个模块提供了一种方便的使用操作系统接口的方法。
- sys 这个模块可供访问由解释器使用或维护的变量和与解释器进行交互的函数。
总结:os模块负责程序与操作系统的交互,提供了访问操作系统底层的接口;sys模块负责程序与python解释器的交互,提供了一系列的函数和变量,用于操控python的运行时环境。
- os.remove(‘path/filename’) 删除文件
- os.rename(oldname, newname) 重命名文件
- os.walk() 生成目录树下的所有文件名
- os.chdir(‘dirname’) 改变目录
- os.mkdir/makedirs(‘dirname’)创建目录/多层目录
- os.rmdir/removedirs(‘dirname’) 删除目录/多层目录
- os.listdir(‘dirname’) 列出指定目录的文件
- os.getcwd() 取得当前工作目录
- os.chmod() 改变目录权限
- os.path.basename(‘path/filename’) 去掉目录路径,返回文件名
- os.path.dirname(‘path/filename’) 去掉文件名,返回目录路径
- os.path.join(path1[,path2[,…]]) 将分离的各部分组合成一个路径名
- os.path.split(‘path’) 返回( dirname(), basename())元组
- os.path.splitext() 返回 (filename, extension) 元组
- os.path.getatime\ctime\mtime 分别返回最近访问、创建、修改时间
- os.path.getsize() 返回文件大小
- os.path.exists() 是否存在
- os.path.isabs() 是否为绝对路径
- os.path.isdir() 是否为目录
- os.path.isfile() 是否为文件
- sys.argv 命令行参数List,第一个元素是程序本身路径
- sys.modules.keys() 返回所有已经导入的模块列表
- sys.exc_info() 获取当前正在处理的异常类,exc_type、exc_value、exc_traceback当前处理的异常详细信息
- sys.exit(n) 退出程序,正常退出时exit(0)
- sys.hexversion 获取Python解释程序的版本值,16进制格式如:0x020403F0
- sys.version 获取Python解释程序的版本信息
- sys.maxint 最大的Int值
- sys.maxunicode 最大的Unicode值
- sys.modules 返回系统导入的模块字段,key是模块名,value是模块
- sys.path 返回模块的搜索路径,初始化时使用PYTHONPATH环境变量的值
- sys.platform 返回操作系统平台名称
- sys.stdout 标准输出
- sys.stdin 标准输入
- sys.stderr 错误输出
- sys.exc_clear() 用来清除当前线程所出现的当前的或最近的错误信息
- sys.exec_prefix 返回平台独立的python文件安装的位置
- sys.byteorder 本地字节规则的指示器,big-endian平台的值是’big’,little-endian平台的值是’little’
- sys.copyright 记录python版权相关的东西
- sys.api_version 解释器的C的API版本
- sys.stdin,sys.stdout,sys.stderr
阅读全文 »
ssh “permissions are too open” error
2021-01-10
出现这个问题是因为~/.ssh/id_rsa文件的权限给的太宽。
如果有这个提示,可以使用命令使得文件只有读权限:
chmod 400 ~/.ssh/id_rsa
或者如果需要添加写权限
chmod 600 ~/.ssh/id_rsa
完毕。
阅读全文 »
docker使用简明教程
2021-01-09
最近项目需要使用了Docker,结果在使用了之后就停不下来。 Docker对于自动化部署来说真真太方便了。
docker是什么
简而言之,docker是一个用于开发、分发和测试、生产的平台。它最大的优势在于:能够迅速自动化的部署开发的应用。Docker相当于在宿主机上虚拟出了N个独立的应用运行环境,每个应用的环境都是独立的,每个应用也是独立的。

从上图可以看出,Docker的主要包括:
- (1)Server:用于运行docker主程,并常驻内存。
- (2)REST API:用于与server进行交互
- (3)CLI(command line interface):docker的命令(比如docker build),有了CLI就可以与server通过命令行进行交互。
两个重要的概念
images
images是Docker中重要的概念之一,相当于Windows的ISO镜像,可以用于安装Windows系统。
比如:docker pull ubuntu相当于拉取一个ubuntu系统的镜像到本地。可以通过命令行执行’‘docker images’‘查看本地拥有哪些镜像。
container
container也是Docker中重要的概念之一,相当于安装好了的Windows系统,可以start、pause、stop、restart。比如:docker run ubuntu相当于安装并启动一个ubuntu系统。通过命令行执行’‘docker ps -a’‘查看所有的容器。
这两个概念在开始的时候不好理解,但是以操作系统的ISO镜像和操作系统去类比会好理解得多。
使用docker
安装
docker在Ubuntu系统中的安装比较简单,只需要执行下面的命令即可:
sudo apt-get update

sudo apt-get install \
    apt-transport-https \
    ca-certificates \
    curl \
    gnupg-agent \
    software-properties-common

curl -fsSL https://download.docker.com/linux/ubuntu/gpg | sudo apt-key add -

sudo apt-key fingerprint 0EBFCD88

sudo add-apt-repository \
   "deb [arch=amd64] https://download.docker.com/linux/ubuntu \
   $(lsb_release -cs) \
   stable"

sudo apt-get update
sudo apt-get install docker-ce docker-ce-cli containerd.io

sudo docker run hello-world
当看到如下输出:
latest: Pulling from library/hello-world
0e03bdcc26d7: Pull complete
Digest: sha256:1a523af650137b8accdaed439c17d684df61ee4d74feac151b5b337bd29e7eec
Status: Downloaded newer image for hello-world:latest

Hello from Docker!
即表示安装成功了。
使用
常用命令:
- attach Attach local standard input, output, and error streams to a running container
- build 根据Dockerfile文件创建镜像
- commit Create a new image from a container’s changes
- cp 在容器和宿主机之前拷贝文件
- create 创建一个新容器
- diff Inspect changes to files or directories on a container’s filesystem
- events Get real time events from the server
- exec Run a command in a running container
- export Export a container’s filesystem as a tar archive
- history Show the history of an image
- images 列出所有的镜像
- import 从本地导入镜像
- info Display system-wide information
- inspect Return low-level information on Docker objects
- kill Kill one or more running containers
- load Load an image from a tar archive or STDIN
- login Log in to a Docker registry
- logout Log out from a Docker registry
- logs Fetch the logs of a container
- pause Pause all processes within one or more containers
- port List port mappings or a specific mapping for the container
- ps 列出所有的容器
- pull 从仓库中拉取镜像
- push 将镜像推送到镜像
- rename 重命名容器
- restart 重启容器
- rm 删除一个或多个容器
- rmi 删除一个或多个镜像
- run 启动一个新容器
- save Save one or more images to a tar archive (streamed to STDOUT by default)
- search Search the Docker Hub for images
- start Start one or more stopped containers
- stats Display a live stream of container(s) resource usage statistics
- stop Stop one or more running containers
- tag Create a tag TARGET_IMAGE that refers to SOURCE_IMAGE
- top Display the running processes of a container
- unpause Unpause all processes within one or more containers
- update Update configuration of one or more containers
- version Show the Docker version information
- wait Block until one or more containers stop, then print their exit codes
如果对命令有疑问可以通过docker --help命令查看命令的使用。
一个例子
1.新建文件Dockerfile
新建目录test/,然后新建Dockerfile文件,内容如下:
FROM ubuntu:18.04
WORKDIR /code

#RUN 执行命令
RUN apt update --yes && apt upgrade --yes

# 安装python
RUN  apt-get install python-dev --yes

COPY . .

# 执行web.py
CMD ["python","web.py"]
2.新建web.py文件
web.py文件中写入如下内容:
print('hello')
2.新建镜像
docker built -t test .
可以看到输出:
Step 17/18 : COPY . .
 ---> 1ba374f5a1d2
Step 18/18 : CMD ["python","web.py"]
 ---> Running in 365d4b7fd252
Removing intermediate container 365d4b7fd252
 ---> 5403a172511d
Successfully built 5403a172511d
Successfully tagged test:latest
表示成功新建了镜像。
3.新建容器
$ sudo docker run test
hello
可以看到hello就是容器的输出,表明容器新建成功。
阅读全文 »
fatal error: ffi.h: No such file or directory问题的解决
2021-01-08
For Debian and Ubuntu:
$ sudo apt-get install build-essential libssl-dev libffi-dev python-dev
For Fedora and RHEL-derivatives:
$ sudo yum install gcc libffi-devel python-devel openssl-devel
For Alpine Linux:
libffi-dev, openssl-dev and python3-dev
阅读全文 »
如何创建自己的私有conda镜像
2020-10-18
本文的组成:
第一部分解释创建自己的镜像的动机;
第二部分介绍分析的过程
第三部分直接贴出具体的步骤。
一、动机
anaconda提供方便的软件包管理方式,通过它能够很方便的使用众多的开源包。但anaconda对国内用户是相当的不友好,下载速度超级慢;之前国内有众多的镜像源解决了这个问题,但去年的第三方源关闭的风波直接导致国内没有一个国内源能供使用。因而如何创建自己的私人镜像就显得很重要了,这将在我们实际的开发过程中节省大量的下载时间。

二、分析
2.1 总体思路
由于python为开源语言,python的安装包一般就是源码的打包,因而下载的安装文件也就是python源码的压缩包,所以创建镜像的思路就是:自动的将软件库中各种包下载到本地,然后设置本地源为本地路径即可。
2.2 分析源的结构
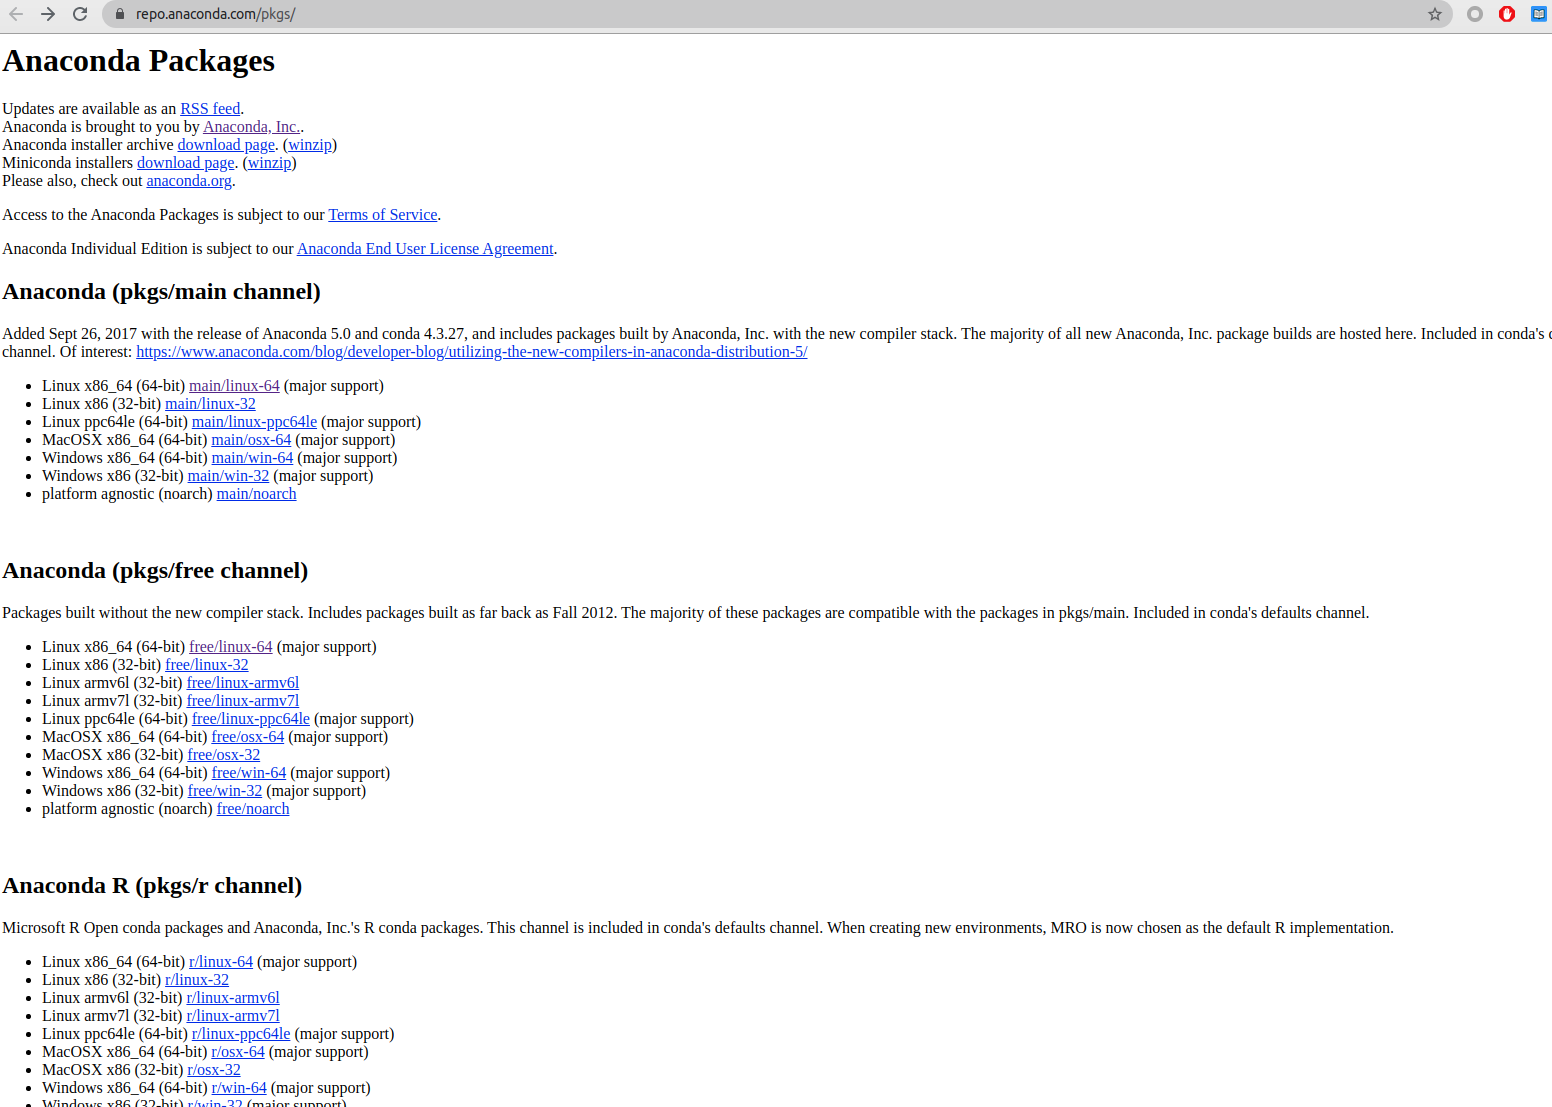
anaconda源分为商业版和官方版两种,两种源如下:


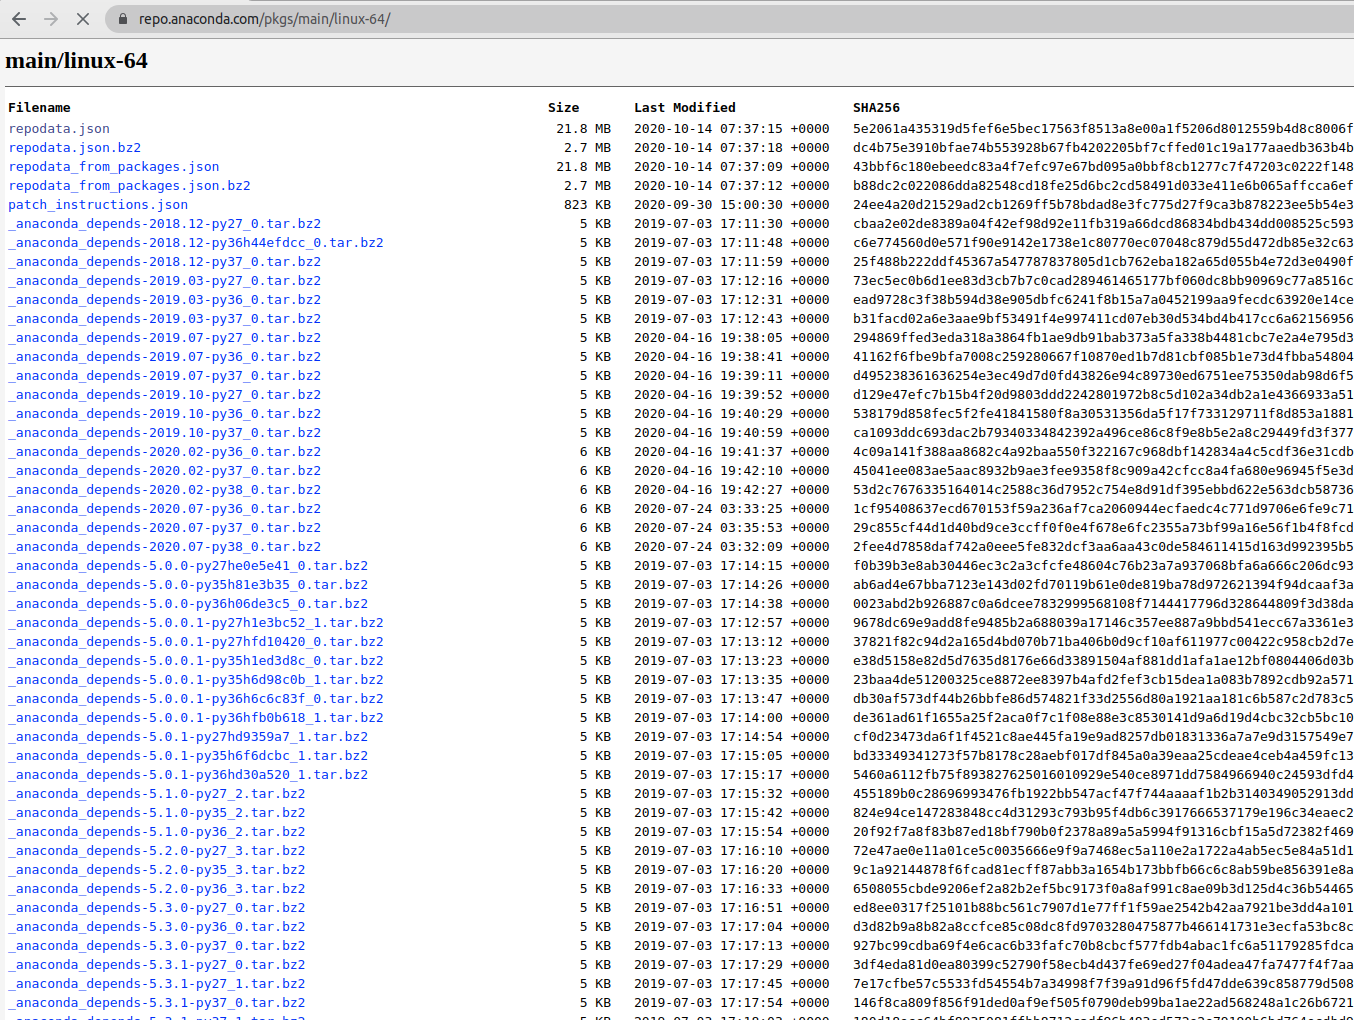
图2、图3就是仓库的首页了,打开https://repo.anaconda.com/pkgs/main/linux-64/可以看到linux-64平台下的所有的包:

从上面的分析可以看出,
社区版本的包网络路径为:
https://conda.anaconda.org/{channel}/{platform}/{file_name}
官方版本为:
https://repo.anaconda.org/{channel}/{platform}/{file_name}
这样就确定了包的下载路径了。
到这里,就确定了具体的镜像思路了:只需要抓取对应源下的平台下的所有包,即可完成镜像。
2.3 设置本地源
由包的链接可以得出抓取之后的路径为:
└── anaconda
    ├── cloud
    │   └── conda-forge
    │       ├── linux-64
    │       └── noarch
    └── pkgs
        ├── free
        │   ├── linux-64
        │   └── noarch
        ├── main
        │   ├── linux-64
        │   └── noarch
        └── pro
            ├── linux-64
            └── noarch
在抓取之后,需要将本地conda环境设置为本地源:
conda config --set channel_alias file://Path_to_your_channel/anaconda/pkgs
conda config --add channels free
conda config --add channels pro
conda config --add channels main
conda config --add channels conda-forge
conda config --remove channels defaults
conda config --set offline True
然后修改~/.condarc :
channels:
  - conda-forge
  - main
  - pro
  - free
channel_alias: file://Path_to_your_channel/anaconda/pkgs
之后通过config –get命令查看具体的设置 :
conda config --get
--set channel_alias file://Path_to_your_channel/anaconda/pkgs
--add channels 'free'   # lowest priority
--add channels 'pro'
--add channels 'main'
--add channels 'conda-forge'   # highest priority
--set offline True
之后想要移除可以通过下面的命令来移除:
conda config --remove channels <your_mistake>
以上,即完成了对官方源和社区源的镜像。
2.4 部分改进
本项目参考了开源项目conda-mirror,并在之上进行了部分改进和优化:
-
1.添加下载进度条;
-
2.添加多线程下载;
-
3.添加main、free的channel支持;
-
4.取消缓存目录在部分操作删除已下载包
三、使用步骤
3.1 安装
git clone https://github.com/lixiang0/conda-mirror
cd conda-mirror
python setup.py install
3.2 使用示例
下载目录下创建conf.yaml,内容为:
blacklist:
    - build: 'py2*'
whitelist:
    - build: 'py3*'
释义:屏蔽python2的版本,只下载python3的版本包
执行命令:
conda-mirror --upstream-channel main --platform linux-64 -vvv --num-threads 12 --temp-directory ./temp/ -k --config conf.yaml
释义:
-
platform:下载对应平台下的包
-
vvv:显示warnning信息
-
num-threads下载和验证线程数目
-
temp-directory:缓存目录
-
k:不使用https
-
config:包过滤配置
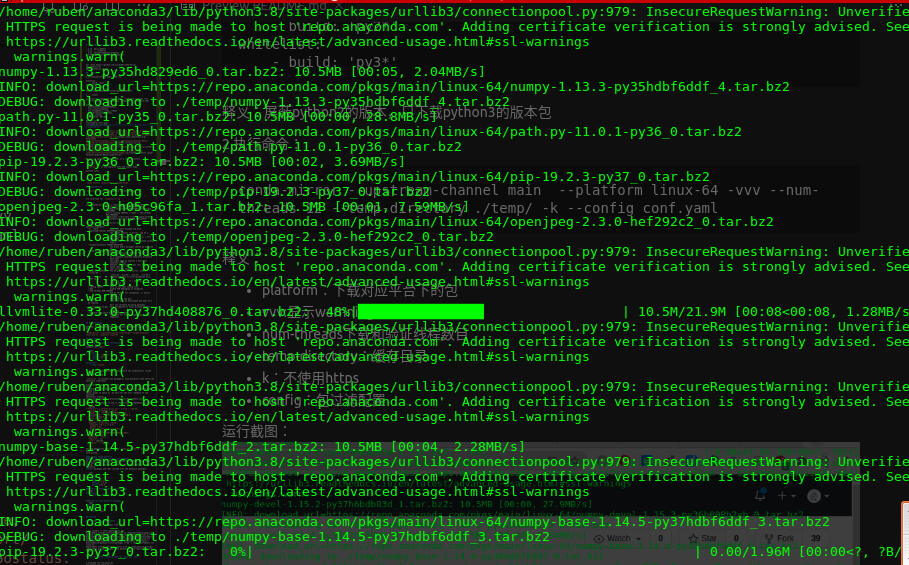
运行截图:

更多的详细修改,可以参考github:https://github.com/lixiang0/conda-mirror
参考链接:
1.https://www.anaconda.com/products/individual

2.https://conda-forge.org/feedstocks/

3.https://repo.anaconda.com/pkgs/

4.https://dreambooker.site/2018/11/16/Set-up-personal-Anaconda-mirror/

5.https://pypi.org/project/conda-mirror/

6.https://docs.python.org/3/library/multiprocessing.html#multiprocessing.pool.Pool

7.https://github.com/Valassis-Digital-Media/conda-mirror
阅读全文 »
ubuntu中如何将多块硬盘映射为一块
2020-10-16
本文分为2部分:
- 第一部分介绍动机
- 第二部分详细介绍具体的步骤
- 第三部分是其他一些有用的命令
一、动机
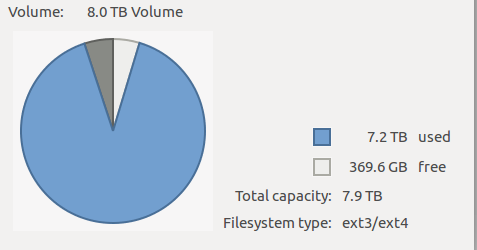
随着工作年限的增长,工作和生活中积累的资源越来越多,尤其收藏的电影、数据集最为占硬盘。以物体跟踪数据集为例,整个TAO数据压缩包就有241.6GB。

以往的方式是挤牙膏式的趁着活动一块一块买,数据一点一点的腾挪。今年以来硬盘持续降价,以我关注的8T硬盘为例,从1200降到了1000。
所以才产生了将多块硬盘映射为一块的方法。这降省去了大量的硬盘管理和数据腾挪的时间。
二、具体的步骤
首先是看看系统挂载了几块盘,执行命令sudo fdisk -l,输出的信息节选如下:
Disk /dev/sdd: 7.3 TiB, 8001563222016 bytes, 15628053168 sectors
Units: sectors of 1 * 512 = 512 bytes
Sector size (logical/physical): 512 bytes / 4096 bytes
I/O size (minimum/optimal): 4096 bytes / 4096 bytes
接着是为新盘创建新分区。
假设/dev/sdd/为新的硬盘,那么执行sudo fdisk /dev/sdd/,可以看到输出:
Command (m for help):
这样就进入硬盘编辑模式了。
- 输入d是删除分区(新盘可以不执行),这里需要注意将原来的数据在别的磁盘进行全部备份。
- 输入n是新建分区;
- 输入t设置新分区的格式
- 输入p是列举硬盘的所有分区;
- 输入w是保存之前的修改。
所以完成的操作就是(省去了d操作):
$ sudo fdisk /dev/sdd

Welcome to fdisk (util-linux 2.27.1).
Changes will remain in memory only, until you decide to write them.
Be careful before using the write command.

Command (m for help): n
Partition number (1-128, default 1): 1
First sector (34-468862094, default 2048):
Last sector, +sectors or +size{K,M,G,T,P} (2048-468862094, default 468862094):

Created a new partition 1 of type 'Linux filesystem' and of size 223.6 GiB.

Command (m for help): t
Hex code (type L to list all codes): 30
Changed type of partition 'Linux filesystem' to 'Linux LVM'.

Command (m for help): w
The partition table has been altered.
Calling ioctl() to re-read partition table.
Syncing disks.
接着安装LVM2和加载LVM2模块:
$ sudo apt-get install lvm2
Reading package lists... Done
Building dependency tree
Reading state information... Done
lvm2 is already the newest version (2.02.133-1ubuntu10).
lvm2 set to manually installed.
0 upgraded, 0 newly installed, 0 to remove and 38 not upgraded.
$ modprobe dm-mod
再执行sudo fdisk -l,可以看到:
Disk /dev/sdd: 223.6 GiB, 240057409536 bytes, 468862128 sectors
Units: sectors of 1 * 512 = 512 bytes
Sector size (logical/physical): 512 bytes / 512 bytes
I/O size (minimum/optimal): 512 bytes / 512 bytes
Disklabel type: gpt
Disk identifier: 571F1D75-FB94-4279-A090-0C96F9AA89B7

Device     Start       End   Sectors   Size Type
/dev/sdd1   2048 468862094 468860047 223.6G Linux LVM
出现了/dev/sdd1的新分区。
以上完成了准备工作,下面就是创建lvm分区了:
- 创建物理盘:
$ sudo pvcreate /dev/sdd1
WARNING: vfat signature detected on /dev/sdd1 at offset 82. Wipe it? [y/n]: y
  Wiping vfat signature on /dev/sdd1.
WARNING: vfat signature detected on /dev/sdd1 at offset 510. Wipe it? [y/n]: y
  Wiping vfat signature on /dev/sdd1.
  Physical volume "/dev/sdd1" successfully created
- 创建分组和逻辑盘
$ sudo vgcreate media /dev/sdd1
  Volume group "media" successfully created

$ sudo lvcreate -l100%FREE -ndisks media
  Logical volume "disks" created.
- 改变逻辑盘格式
$ sudo mke2fs -t ext4 /dev/media/disks
mke2fs 1.42.13 (17-May-2015)
Discarding device blocks: done
Creating filesystem with 58606592 4k blocks and 14655488 inodes
Filesystem UUID: 6d2517f0-d5eb-4bf9-955c-cce175b03e9e
Superblock backups stored on blocks:
	32768, 98304, 163840, 229376, 294912, 819200, 884736, 1605632, 2654208,
	4096000, 7962624, 11239424, 20480000, 23887872

Allocating group tables: done
Writing inode tables: done
Creating journal (32768 blocks): done
Writing superblocks and filesystem accounting information: done
- 挂载
$ mkdir ~/disks

sudo mount /dev/media/disks ~/disks/
sudo umount /dev/media/disks #取消挂载

$ sudo vim /etc/fstab
#这一步是一劳永逸的方式,直接在系统进行<磁盘,目录>映射
/dev/media/disks ~/disks/ ext4 defaults 0 1
三、其他
sudo vgextend media /dev/sdb1
将/dev/sdb1分配给media组。
sudo lvextend -L+150G /dev/media/disks
sudo resize2fs /dev/media/disks
额外分配150G给/dev/media/disks,并更新
sudo vgdisplay
显示当前的分区情况。比较重要的是:
  Alloc PE / Size       431253 / 1.65 TiB
  Free  PE / Size       478 / 1.87 GiB
这里可以关注的是还有多少空余空间。
阅读全文 »
如何为爬虫添加下载进度条
2020-10-08
1.引言
之前写过如何编写一个微博爬虫的文章,后来将微博爬虫开源到了GitHub上。 传统的视频图片的抓取姿势是如何的呢?如果使用requests包可以简单到下面这样的一句代码:
requests.get(img_url,stream=True).content
上述代码所完成的操作仅仅就是
- 1、打开网络流;
- 2、读取返回的内容。
为了突出重点,这里省略了代理、Header、以及超时的设置。但这样做不能分辨出假死的情况,尤其是微博这种视频图片居多的网站,很有可能卡在抓取视频图片的过程中不动。或者在下载大文件的时候,虽然文件一直在下载,但我们却不知道文件到底下载了多少,还有多少时间。
所以在爬虫开发过程中,如果能动态的展示视频或图片的下载过程对于监控爬虫运行时非常必要的。
 图表 1 迅雷下载中的进度条
2.正文
要做到为下载过程添加进度条,首先需要了解requests.get()方法和tqdm包。
2.1 tqdm包
tqdm来自阿拉伯文taqaddum ,意思是进度,也是西班牙语中的te quiero demasiado缩写,意思是我非常爱你。
2.1.1 安装的方式
conda install -c conda-forge tqdm
pip install tqdm
2.1.2 使用
tqdm使用起来也非常方便,最简单的用法如下:
from tqdm import tqdm#导入相应的方法
for i in tqdm(range(10000)):#tqdm()方法
	pass
只需要引入tqdm方法,然后使用将可迭代(iterable)的对象传入tqdm()方法即可。
复杂一点的用法如下:
with tqdm(total=100) as pbar:#tqdm方法设置进度条长度
    for i in range(10):
        sleep(0.1)
        pbar.update(10)#手动更新进度
2.2 requests
2.2.1 get
本文获取文件长度通过requests.get()方法。Requests.get()方法当stream=True的时候,get()方法只下载Header部分,如果要下载Body部分,需要读取content属性才会下载。所以我们可以利用这一点来完成对视频图片的下载监控。获取文件大小的方法如下:
response=requests.get(img_url,stream=True)
file_size=response.headers['Content-length']
2.2.2 iter_content
Iter_content方法用于分块读取get()方法返回的流,避免因一次性读取消耗大量内存。
3.为视频图片下载添加进度条
完整的代码如下:
import requests
import tqdm
img_url='http://122.51.50.206:8088/imgs/63943f53ly1gjgojmh9zaj222o0yi7wq.jpg'
response=requests.get(img_url,stream=True)
file_size=response.headers['Content-length']
print(file_size)
pbar=tqdm.tqdm(total=int(file_size),unit='B',unit_scale=True,desc=img_url.split('/')[-1])
with(open('1.jpg','wb')) as f:
    for chunk in response.iter_content(chunk_size=1024):
        if  chunk:
            f.write(chunk)
            pbar.update(1024)
pbar.close()
步骤如下: (1) 获取Header (2) 读取Header中的Content-length字段得到文件大小 (3) 初始化tqdm (4) 分块读取文件并更新进度条 (5) 关闭进度条
最后,欢迎持续关注。
